25 days of learning Rust: what worked + takeaways

I have been having a blast learning Rust, now 25 days in a row! πŸŽ‰

What has worked

1. Start building ASAP

Do a bit of initial study, but leave the theory soon and start building from day one (fake it before you make it).

Back it up with reading/study, but code every day! Converting Pybites tools, originally written in Python, to Rust kept it fun for me.

2. Use AI tools

Use AI for both coding and explaining concepts.

It's like having a dedicated research assistant and is much faster than googling or using Stack Overflow. Combined with the first strategy, you are knee-deep in code quickly, which boosts your learning.

3. Blog about your journey

Blogging forces you to understand concepts more thoroughly and share your insights. The first strategy ensures you always have content to talk about, and using AI tools, like ChatGPT for research and Co-pilot for writing, you can do this faster and better.

Additionally, blogging regularly forces you to put content out there, which also helps with the impostor syndrome that often comes with learning something new. πŸ’‘

4. Find an accountability partner

Find someone who is further along with the language to guide and encourage you.

A special shout-out to Jim Hodapp, who has been instrumental in clarifying doubts and supporting my journey.

Some wins / takeaways

1. Re-thinking things in Python

Rust’s emphasis on safety and correctness through its strict compiler checks and ownership system has highlighted the areas where Python’s flexibility could potentially lead to bugs and less maintainable code.

For example, with the Rust learning experience so far, I am even more eager to use type hints in Python or add stricter validation with Pydantic. These tools add a layer of safety and correctness to Python code, which learning Rust made me more aware of and appreciate more.

Similarly, Rust's default immutability makes you reflect on what that can mean for your Python code. It has made me more aware of the potential risks and benefits of mutable data structures, encouraging me to adopt immutability in Python where possible to enhance code safety and maintainability.

So a side effect of learning Rust is that I will become a better Python programmer. 🐍

2. Learning Rust is a journey - it's hard, but rewarding

Rust is a complex language, and the learning curve is steep. But the challenge is what makes it fun and rewarding. πŸš€

I think the most important thing is to not take it all in at once. Break it down into small, manageable chunks, and build something at every step, even if it's small. πŸ’‘

Then gradually expose yourself to more advanced concepts, but be realistic with your timelines.

I have been mostly doing scripting so far and that's fine, at least I got quite some code written, and even shipped.

And there is something special about the compiler. 😍 It's strict and unforgiving, but it also becomes your best friend.

The feeling of accomplishment when you get the code to compile and run is awesome, specially knowing that that code is probably safe and performant. πŸŽ‰

3. Adding an amazing tool to my toolbox

Rust's performance capabilities are impressive. Even though I haven't delved deeply into this aspect yet, I did learn how to integrate Rust into Python.

So when I need to write performance-critical code, I can now try to use Rust and integrate it with Python.

4. Reaffirming the Pybites trifecta

The combination of "building - JIT learning - putting content out" works beyond Python. It turns out to be an effective template to learn any new language or technology. 😎

Conclusion

Learning Rust has been useful on many levels, but it's easy to get into tutorial paralysis when learning a new language.

So by building concrete tools, using AI, blogging, and finding an accountability partner, I have been able to keep the learning fun and productive. πŸš€

I am only 25 days in, and I have a long way to go. But I am excited to see where this journey takes me over time ... πŸ“ˆ

Using rusoto to upload a file to S3

A while ago I made a Python script to upload files to an S3 bucket. It's a simple script that uses the boto3 library to interact with the AWS API. Check it out here.

Let's see how to do this with Rust and the rusoto crate.

First, I added the following dependencies to my Cargo.toml file:

...
[dependencies]
clap = { version = "4.5.7", features = ["derive", "env"] }
rusoto_core = "0.48.0"
rusoto_s3 = "0.48.0"
tokio = { version = "1.38.0", features = ["full"] }

This is what I came up with for the first iteration:

use rusoto_core::{Region, credential::EnvironmentProvider, HttpClient};
use rusoto_s3::{S3Client, S3, PutObjectRequest};
use tokio::fs::File;
use tokio::io::AsyncReadExt;
use std::error::Error;
use clap::Parser;
use std::path::Path;

#[derive(Parser, Debug)]
#[clap(about, version, author)]
struct Args {
    #[clap(short, long, env = "S3_BUCKET_NAME")]
    bucket: String,
    #[clap(short, long, env = "AWS_REGION")]
    region: String,
    #[clap(short, long)]
    file: String,
}

async fn upload_image_to_s3(bucket: &str, key: &str, file: &str, region: Region) -> Result<(), Box<dyn Error>> {
    let s3_client = S3Client::new_with(HttpClient::new()?, EnvironmentProvider::default(), region);

    let mut file = File::open(file).await?;
    let mut buffer = Vec::new();
    file.read_to_end(&mut buffer).await?;

    let put_request = PutObjectRequest {
        bucket: bucket.to_string(),
        key: key.to_string(),
        body: Some(buffer.into()),
        ..Default::default()
    };

    s3_client.put_object(put_request).await?;

    println!("File uploaded successfully to {}/{}", bucket, key);
    Ok(())
}

#[tokio::main]
async fn main() -> Result<(), Box<dyn Error>> {
    let args = Args::parse();

    let key = Path::new(&args.file)
        .file_name()
        .and_then(|name| name.to_str())
        .ok_or("Invalid file path")?;

    let region = args.region.parse::<Region>()?;

    upload_image_to_s3(&args.bucket, key, &args.file, region).await?;

    Ok(())
}
  • I use Clap (as usual) for handling command-line arguments.
  • I use the rusoto_core and rusoto_s3 crates to interact with the AWS API.
  • I use the tokio crate to make it asynchronous.
  • The upload_image_to_s3 function reads the file, creates a PutObjectRequest, and uploads the file to the specified S3 bucket.
  • The main function parses the command-line arguments, extracts the file name, and uploads the file to S3.

To run the program, you need to set the AWS_ACCESS_KEY_ID and AWS_SECRET_ACCESS_KEY environment variables:

$ export AWS_ACCESS_KEY_ID=your_access_key_id
$ export AWS_SECRET_ACCESS_KEY=your_secret_access_key

And either specify region and bucket from the command line or set the S3_BUCKET_NAME and AWS_REGION environment variables if you always want to use the same bucket and region:

$ export S3_BUCKET_NAME=example-bucket
$ export AWS_REGION=us-east-2

With all this set you only need to give the file you want to upload:

$ cargo run -- -f ~/Desktop/cat.png
...
File uploaded successfully to example-bucket/cat.png

Conclusion

And that's it, a Rust utitlity to upload files to S3. πŸš€

I extended the program a bit to allow multiple files to be uploaded and list the images, including with pagination so I can use it later with HTMX' infinite scroll. I will write about that in a future post ...

The repo is here and I pushed it to crates.io as well. πŸ¦€

Making an immutable hashmap constant

The other day I needed an dictionary / HashMap to look up abbreviated content types.

Constant dictionary / hashmap

I wondered how to make it constant and if I could use the nice Python dict.get(key, key) idiom to return the key itself if it is not found in the dictionary.

I found the phf crate, which is a perfect fit for this it seems. And it supports the get method and the unwrap_or method to provide a default value if the key is not found.

Another option is lazy_static but I read that phf enforces immutability more strictly by design and that it can provide more efficient access patterns due to its compile-time optimizations (the data is embedded in the binary).

phf example

I added this code (commit):

use phf::phf_map;

static CATEGORY_MAPPING: phf::Map<&'static str, &'static str> = phf_map! {
    "a" => "article",
    "b" => "bite",
    "p" => "podcast",
    "v" => "video",
    "t" => "tip",
};


fn main() {
    for ct in &["a", "b", "p", "v", "t", "not found"] {
        let value = CATEGORY_MAPPING.get(ct).unwrap_or(&ct).to_string();
        println!("{} -> {}", ct, value);
    }
}

This prints:

a -> article
b -> bite
p -> podcast
v -> video
t -> tip
not found -> not found
  • The phf_map! macro creates a constant hashmap.
  • The CATEGORY_MAPPING is a static variable that holds the hashmap.
  • The get method is used to lookup the key in the hashmap.
  • The unwrap_or method is used to provide a default value if the key is not found.
  • The to_string method is used to convert the value to a string.

Note that you need to enable the macros feature in your Cargo.toml file:

Configuring phf

phf = { version = "0.11.2", features = ["macros"] }

Conclusion

With phf you can create a constant hashmap in an efficient way. It is a good fit for cases where you need to look up values by key and you want to enforce immutability. πŸ’‘

And with that you can now use Pybites Search with both -c a and -c article, -c b and -c bite, etc. πŸŽ‰ πŸš€

Linting your Rust code with Clippy

In Python you often use flake8, pyflakes and/or ruff to lint your code. In Rust, you can use Clippy.

Clippy is a collection of lints to catch common mistakes and improve your Rust code. Let's try it out on Pybites Search.

Installing and running Clippy

First make sure you install Clippy:

$ rustup component add clippy

Next you can invoke it in any project through Cargo:

$ cargo clippy

Running this in the Pybites search project we get:

√ search (main) $ cargo clippy
    Checking pybites-search v0.6.0 (/Users/pybob/code/rust/search)
warning: writing `&Vec` instead of `&[_]` involves a new object where a slice will do
   --> src/main.rs:108:25
    |
108 | fn save_to_cache(items: &Vec<Item>) -> Result<(), Box<dyn std::error::Error>> {
    |                         ^^^^^^^^^^
    |
    = help: for further information visit https://rust-lang.github.io/rust-clippy/master/index.html#ptr_arg
    = note: `#[warn(clippy::ptr_arg)]` on by default
help: change this to
    |
108 ~ fn save_to_cache(items: &[Item]) -> Result<(), Box<dyn std::error::Error>> {
109 |     let cache_path = get_cache_file_path();
110 |     let cache_data = CacheData {
111 |         timestamp: SystemTime::now().duration_since(UNIX_EPOCH)?.as_secs(),
112 ~         items: items.to_owned(),
    |

warning: `pybites-search` (bin "psearch") generated 1 warning
    Finished `dev` profile [unoptimized + debuginfo] target(s) in 1.16s

The warning is about using &Vec instead of &[_]. The fix is to change the function signature to fn save_to_cache(items: &[Item]) -> Result<(), Box<dyn std::error::Error>> { (and items.clone() to items.to_vec() in the function body).

It's useful to check out the associated link where we can read about the why:

Requiring the argument to be of the specific size makes the function less useful for no benefit; slices in the form of &[T] or &str usually suffice and can be obtained from other types, too.

And a suggested fix:

fn foo(&Vec<u32>) { .. }

// use instead:

fn foo(&[u32]) { .. }

Note this is a warning, not an error, you can still compile and run your code.

But it's good practice to fix these warnings to improve the quality of your code. πŸ¦€ 🧹

Running Clippy on another project

Let's run it on the resize-images project:

warning: the borrowed expression implements the required traits
  --> src/main.rs:54:105
   |
54 |                 let output_path = Path::new(&output_dir).join(path.file_stem().unwrap()).with_extension(&extension);
   |                                                                                                         ^^^^^^^^^^ help: change this to: `extension`
   |
   = help: for further information visit https://rust-lang.github.io/rust-clippy/master/index.html#needless_borrows_for_generic_args
   = note: `#[warn(clippy::needless_borrows_for_generic_args)]` on by default

warning: `resize-images` (bin "resize-images") generated 1 warning (run `cargo clippy --fix --bin "resize-images"` to apply 1 suggestion)
    Finished `dev` profile [unoptimized + debuginfo] target(s) in 6.81s

This time it's about a needless borrow for generic args. The fix is to remove the & from with_extension(&extension).

Again the help link explains why:

Suggests that the receiver of the expression borrows the expression.

And shows an example + fix:

fn f(_: impl AsRef<str>) {}

let x = "foo";
f(&x);

// use instead:
fn f(_: impl AsRef<str>) {}

let x = "foo";
f(x);

Auto-fixing Clippy warnings

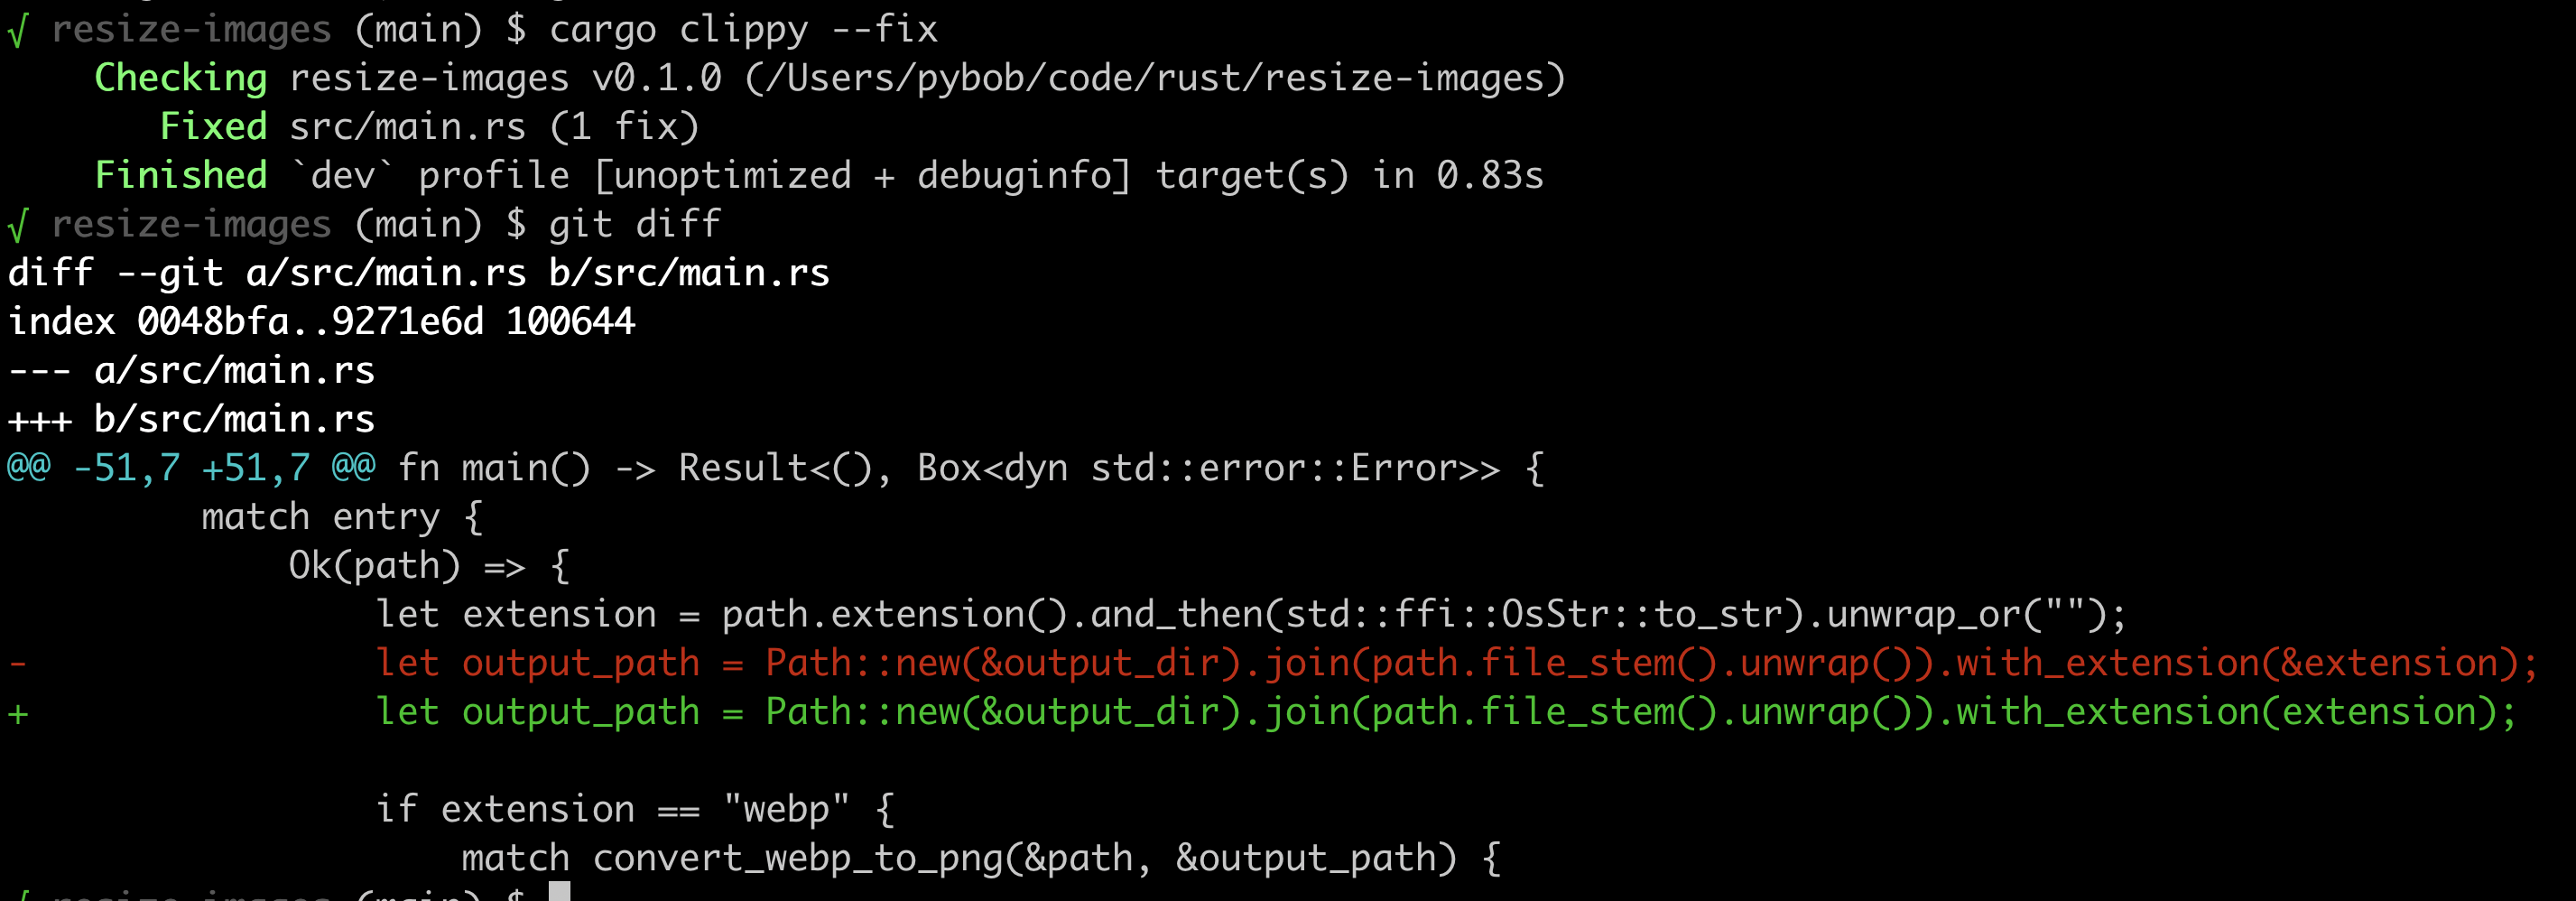
You can also auto-fix Clippy warnings with cargo clippy --fix. This will apply the suggestions it has for you. It's a great way to quickly clean up your code.

$ cargo clippy --fix
Example of clippy autofixing an error

Running Clippy as part of pre-commit

You can run Clippy as part of your pre-commit hooks. This way you can't commit code with Clippy warnings.

If you're new to pre-commit, check out my video here

To do this, install the pre-commit tool and add the following to a .pre-commit-config.yaml file in your project (taken from here):

repos:
  - repo: https://github.com/doublify/pre-commit-rust
    rev: v1.0
    hooks:
    - id: fmt
      name: fmt
      description: Format files with cargo fmt.
      entry: cargo fmt
      language: system
      types: [rust]
      args: ["--"]
    - id: cargo-check
      name: cargo check
      description: Check the package for errors.
      entry: cargo check
      language: system
      types: [rust]
      pass_filenames: false
    - id: clippy
      name: clippy
      description: Lint rust sources
      entry: cargo clippy
      language: system
      args: ["--", "-D", "warnings"]
      types: [rust]
      pass_filenames: false

Apart from clippy, this also includes fmt and cargo check hooks.

Then install the pre-commit hooks:

$ pre-commit install

Now every time you commit code, Clippy + friends will run and you can't commit code with warnings. 🚫

To run it on all files retroactively in your project:

$ pre-commit run --all-files

I just did that and see here the result.

Imports are nicely ordered and the code is better formatted. This reminds me a lot of isort and black in Python, where Clippy is more like flake8 and pyflakes πŸ¦€ 🐍 😍

Conclusion

Clippy is a great tool to help you write better Rust code. It's easy to install and run. You can even auto-fix warnings. πŸ’ͺ πŸ“ˆ

There are many more configuration options, check out the Clippy lints and its GitHub repo for more info.

It's also convenient to run it as part of pre-commit. This way you can't commit code with warnings. It's a great way to keep your code clean and readable. πŸ¦€ 🧹

Alarm clock part II - text to speech

I tweaked my alarm clock app today to add text-to-speech (TTS).

I started with the obvious choice: tts crate, but it did not work on my Mac, no audio.

Adding text-to-speech

So I got a bit creative and ended up with this function:

pub fn speak_message(message: &str) -> Result<(), Box<dyn std::error::Error>> {
    if cfg!(target_os = "macos") {
        Command::new("say")
            .arg(message)
            .output()
            .expect("Failed to execute say command on macOS");
    } else if cfg!(target_os = "windows") {
        Command::new("powershell")
            .arg("-Command")
            .arg(&format!("Add-Type –TypeDefinition \"using System.Speech; var synth = new Speech.Synthesis.SpeechSynthesizer(); synth.Speak('{}');\"", message))
            .output()
            .expect("Failed to execute PowerShell TTS on Windows");
    } else if cfg!(target_os = "linux") {
        Command::new("espeak")
            .arg(message)
            .output()
            .expect("Failed to execute espeak on Linux");
    } else {
        eprintln!("Unsupported operating system for TTS");
    }
    Ok(())
}
  • On macOS, it uses the say command (built-in / ships by default with macOS). For Windows, it uses PowerShell to speak the message. And on Linux, it uses espeak. Note that I mostly care about a Mac solution right now, so I have not tested the Windows + Linux ones yet ...

  • cfg!(target_os = "...") is a Rust macro that checks the target operating system (similar how you can use the platform module in Python). It is a compile-time check, so the code for other operating systems will not be included in the binary.

  • The expect method is used to panic if the command fails. I probably should handle the error more gracefully, I will improve this later.

  • println! prints to standard output. To print to standard error, you can use eprintln! and it's good practice to use it for error messages.

  • The return type is Result<(), Box<dyn std::error::Error>> to indicate that the function can return an error. The Box<dyn std::error::Error> is a trait object that can hold any type that implements the Error trait. I am seeing this pattern quite a bit in Rust code.

New command-line arguments

The message to speak is a new (Clap) command-line argument:

const DEFAULT_MESSAGE: &str = "You set an alarm, time is up!";
...

/// Message to speak instead of playing an audio file
#[arg(short = 'M', long, required = true, default_value = DEFAULT_MESSAGE)]
message: String,

And I play it a couple of times, another new command-line argument:

const TIMES_TO_PLAY: usize = 3;
...

/// Times to play the alarm sound
#[arg(short, long, default_value_t = TIMES_TO_PLAY)]
times: usize,

I added this loop to play the message multiple times:

for _ in 0..args.times {
    speak_message(&args.message).unwrap();
}

The nice thing about usize (and typing in general) is that it excludes invalid options.

For example, if the user enters a negative number, the program will not compile. The usize type is an unsigned integer, meaning that it cannot be negative.

Ranges in Rust (vs Python)

The 0..N construct is similar to range in Python, where the upper bound is also exclusive. Also in both languages, the lower bound is inclusive. To make the upper bound inclusive, you can use 0..=N in Rust. So I could also write 1..=args.times to play the message args.times times.

You can also use std::iter::repeat here I learned:

std::iter::repeat(()).take(args.times).for_each(|_| {
    speak_message(&args.message).unwrap();
});

But that seems more verbose and complicated than the more concise and readable for loop so I stuck with that.

So running the program like this it will say "Wake up" 3 times after 3 seconds:

$ cargo run -- -M "Wake up" -s 3
# says "Wake up" three times

Why 3 times? By not specifying the number of times, it will default to 3 (see the TIMES_TO_PLAY constant).

Conclusion

I like the current 0.3.0 (available on crates.io) better than the previous ones, where I was playing an alarm file. This had the added complexity of downloading and playing an audio file.

The text-to-speech feature is less code relatively and actually tells the user what the alarm is about. The only thing is compatibility, I need to test it on Windows and Linux still ...

As usual, by building things I've learned more about interesting Rust features and idioms. I am also getting more comfortable with the language and its ecosystem. 😍 πŸ“ˆ

I will probably use this project to write some more posts about 1. code structuring (modularizing your code), 2. testing and 3. documentation. Stay tuned! πŸš€